
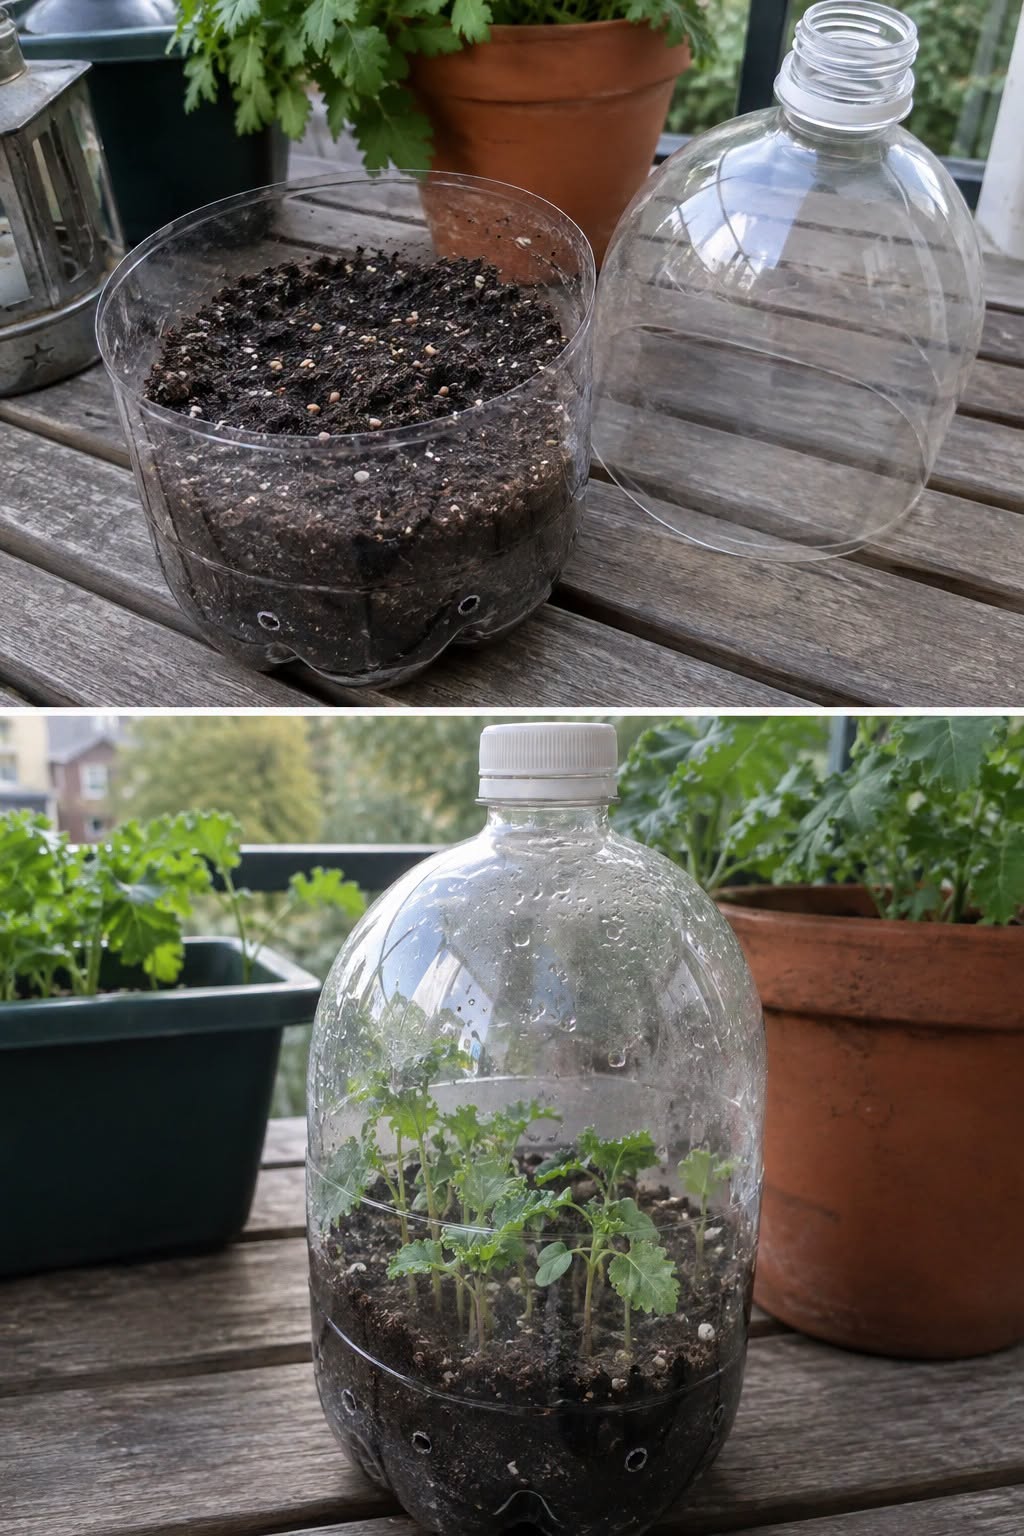
Kale is one of the most resilient leafy greens you can grow, but giving its seeds a warm, protected start can help ensure strong and healthy plants. If you want to grow kale at home but lack a greenhouse, you can create mini versions using recycled plastic bottles. These bottle greenhouses are perfect for seed starting, especially in cooler seasons or areas with unpredictable weather. They’re inexpensive, eco-friendly, and suitable for gardeners of all experience levels.
Why Use Bottle Greenhouses for Kale?
Kale grows well in cool weather, but young seedlings can still be affected by sudden temperature drops, heavy rain, or pests. A mini greenhouse made from a clear plastic bottle traps warmth during the day, maintains moisture, and shields tender seedlings from environmental stress. This helps seeds germinate faster and ensures the young plants get a healthy head start.
By reusing plastic bottles, you also reduce waste and make gardening more sustainable—a win for both your plants and the planet.
Choosing the Right Bottle
For kale seed starting, clear 1.5 to 2-liter bottles work best. They should be free of labels, as labels can block light. If you live in an area with very strong sunlight, lightly sanding the bottle or using frosted plastic can help diffuse light and prevent overheating inside.
Make sure the bottles are clean and free from any residue. Using a transparent bottle ensures your seedlings get the light they need to grow strong and healthy.
Preparing Your Bottle Greenhouse
Transforming a plastic bottle into a seed-starting greenhouse is simple:
- Cut the Bottle – Using a sharp knife or scissors, slice the bottle horizontally about two-thirds from the base. This gives you a deep bottom section for soil and a tall top section for the greenhouse cover.
- Add Drainage – Poke small holes in the bottom of the lower section to prevent excess water from accumulating. Good drainage is essential for healthy root growth.
- Fill with Soil – Use a light, well-draining seed-starting mix enriched with compost. Avoid heavy garden soil, which can become compacted and slow germination.
Planting Kale Seeds
Sow kale seeds about 1–1.5 cm deep in the prepared soil, spacing them according to the seed packet instructions or about 2–3 cm apart if you plan to thin them later. Lightly cover with soil and mist with water until evenly moist.
Assembling the Greenhouse
Place the top section of the bottle back over the bottom section, forming a sealed enclosure. Keep the cap on for the first few days to retain warmth and humidity, which speeds up germination.
Once seedlings appear, remove the cap or open it during the day to allow ventilation and prevent overheating. Good airflow reduces the risk of fungal diseases such as damping-off.
Positioning Your Bottle Greenhouses
Set the bottles in a sunny spot where they can receive at least 4–6 hours of light daily. A windowsill, balcony, or sheltered outdoor area works well. If placing them outside early in the season, the greenhouse will protect the seeds from light frost and cold winds.
If wind is a concern, partially bury the base of the bottle in soil or place it in a stable tray to keep it from tipping over.
Caring for Kale Seedlings
- Watering – The enclosed environment reduces evaporation, so you won’t need to water often. Check soil moisture regularly and mist if it feels dry.
- Ventilation – Gradually increase ventilation by removing the cap during the day and replacing it at night until seedlings are strong enough to adapt to outside air.
- Thinning – Once seedlings are about 5 cm tall, thin them to the strongest plants, leaving enough space for them to grow without crowding.
Transplanting to Larger Pots or the Garden
After two to three weeks, or when seedlings have at least two sets of true leaves, they’re ready for transplanting. Harden them off by placing the bottles outdoors for a few hours each day, gradually increasing the time over a week.
When transplanting, handle seedlings carefully to avoid damaging the roots. Space kale plants about 30–45 cm apart in nutrient-rich soil for optimal growth.
Benefits of Using Bottle Greenhouses for Kale
- Cost-Effective – Uses materials you likely already have.
- Eco-Friendly – Reduces plastic waste by repurposing bottles.
- Seed Protection – Shields seeds from pests and harsh weather.
- Better Germination – Maintains ideal warmth and humidity for sprouting.
- Portable – Easily move the bottles to chase sunlight or shelter from storms.
Tips for Success
- Avoid overwatering, as the enclosed design holds moisture well.
- Rotate bottles occasionally to ensure seedlings grow evenly toward the light.
- Disinfect bottles before reuse to prevent disease transmission.
- Label each bottle with the planting date and variety to keep track of growth.
By turning simple plastic bottles into mini greenhouses, you can give your kale seeds a healthy start without needing expensive equipment. This DIY method makes seed starting easy, affordable, and sustainable, helping you enjoy a steady supply of nutrient-rich kale throughout the growing season.